Watercolor painting offers a unique artistic journey, blending fluidity and control. Mastering watercolor techniques requires understanding the medium’s characteristics. This art form uses translucent washes to create luminous effects. Explore the basic principles for beginners to build a solid foundation in this captivating art.
Basic Watercolor Techniques for Beginners
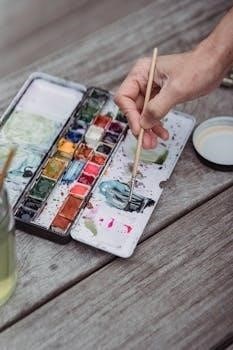
Embarking on your watercolor journey, start with understanding fundamental techniques. Begin with mastering brush control, learning how to load your brush with the right amount of water and pigment. Practice creating even washes by applying consistent pressure, moving from light to dark tones. Experiment with flat washes, blending colors smoothly over a specific area. Explore graded washes, gradually transitioning between shades. Understand the importance of layering, allowing each wash to dry before adding the next. These basic techniques will help you build a strong foundation for more advanced skills. Discover the beauty of controlling water and pigment to create stunning effects. Proper technique is key to your success in the art of watercolor painting. Begin with practice, patience and passion, allowing your artistry to flourish with each brush stroke.
Importance of Reserving Whites
In watercolor painting, reserving whites is a crucial technique for achieving luminosity and highlights. The white of the paper itself acts as the lightest tone, unlike other mediums where white paint is used. Therefore, planning ahead and leaving areas untouched is essential. This technique provides a natural brightness that cannot be easily replicated with paint. Reserving whites is not just about avoiding those areas, but also about creating contrast and depth within your artwork. Effective reserving can be done by painting around the white areas or using masking techniques. This allows for complex compositions with pristine highlights. The ability to master reserving whites will greatly enhance the overall impact of your watercolor paintings. It gives your art a sense of light and vibrancy, making it an essential skill to learn. It is a fundamental technique, giving your work a unique look.
Essential Watercolor Techniques
Explore fundamental watercolor techniques that are vital for every artist. These techniques are the building blocks of watercolor painting. Mastering these essential methods will allow you to control your paint and create captivating artworks. The following techniques will be very useful in your practice.
Wet-on-Wet Technique
The wet-on-wet technique is a foundational watercolor method where paint is applied to a wet paper surface. This allows colors to blend and flow seamlessly, creating soft, diffused edges and dreamy backgrounds. It’s perfect for skies, atmospheric effects, and loose, abstract compositions. The key is to work quickly and allow the water to do much of the work, embracing the unpredictable nature of the medium. The wet paper encourages colors to mingle and merge organically, resulting in beautiful, subtle gradients. This technique requires a good understanding of water control and paint consistency. Beginners may find it challenging at first, but with practice, this method can yield some truly stunning results. It’s essential to maintain the paper’s wetness to ensure the desired effects are achieved. This technique is often used to create soft, ethereal backgrounds, but with practice, it can be used to create complex and layered effects. This technique is essential for watercolor artists.
Wet-on-Dry Technique
The wet-on-dry technique involves applying wet watercolor paint onto a dry paper surface. This method results in sharp, defined lines and distinct shapes, offering a higher degree of control over the paint. It’s ideal for detailed work, creating precise edges, and layering colors with minimal blending. Unlike the wet-on-wet method, the wet-on-dry approach allows for more controlled application, making it suitable for intricate details and fine lines. The paint tends to stay where it is placed, leading to defined shapes and edges; Using this technique enables artists to build up layers with clear separation, achieving a more structured look. It’s often used when painting realistic elements or adding highlights and shadows with precision. It’s perfect for details such as architecture, botanical studies, or any subject matter that requires defined edges. This technique is a staple for artists who seek more control over the flow of their paint and precise shapes.
Glazing Technique
The glazing technique in watercolor involves layering thin, transparent washes of paint over previous dry layers. This method allows artists to build up color intensity, depth, and subtle variations in tone without making the colors appear muddy. Each layer of glaze modifies the colors beneath, creating a luminous and rich effect. When using this technique, it’s important to let each layer dry completely before adding another to prevent colors from mixing directly on the paper. The key is to use thin washes, allowing the paper’s white to shine through and add luminosity. Glazing is perfect for achieving subtle shifts in color and creating a sense of depth and dimension. It’s commonly used to add shadows, highlights, and overall color harmony to a painting. The process requires patience and precision but yields vibrant and complex results. This technique is essential for watercolor artists looking to create refined and detailed work.
Advanced Watercolor Techniques
Elevate your watercolor art with advanced techniques. These methods introduce texture, depth, and unique effects to your paintings. Explore masking, salt application, splattering, and sponging to expand your artistic skills. Experimentation is key to mastering these methods.
Masking Techniques
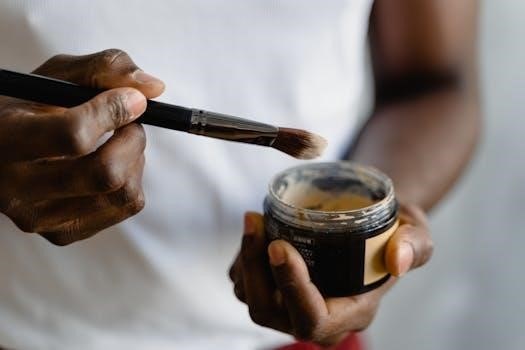
Masking techniques are crucial for preserving white areas and creating crisp edges in watercolor paintings. These methods involve using materials that resist watercolor paint, allowing you to paint freely without worrying about covering specific parts of your paper. Liquid masking fluid, applied with a brush or ruling pen, is a popular choice, creating a temporary barrier that can be peeled away once the surrounding paint is dry. Masking tape is also incredibly useful, especially for geometric shapes or sharp lines. You can use it to create clean borders, stripes, or defined areas. Another option is masking film, which is ideal for covering large sections of your paper, providing broad areas that stay paint-free. These masking methods offer a high degree of control over your compositions, enabling intricate designs and complex layering without the risk of losing your highlights. Experimenting with different masking techniques is essential to understanding which method suits your specific artistic goals and style, and they will undoubtedly enhance your watercolor skills.
Using Salt for Texture
Using salt is a fascinating technique for creating unique textures in watercolor paintings. When sprinkled onto wet washes, salt crystals absorb the surrounding water, drawing pigment with them. As the water evaporates, it leaves behind beautiful, speckled patterns. The size of the salt crystals will determine the texture; fine salt results in smaller, more delicate patterns, while coarse salt creates larger, more dramatic effects. The timing of the salt application is also crucial. Applying salt too early or too late can affect the final result. Experiment with different types of salt and application timing to discover the diverse textures you can achieve. The technique adds an element of randomness and spontaneity to your work, making each piece unique. It’s an excellent method for depicting foliage, sand, or snow, and for adding interesting background effects. Remember to brush the salt off once the paint is completely dry to reveal the textured surface.
Splattering and Sponging
Splattering and sponging are two dynamic watercolor techniques that can add exciting textures and effects to your artwork. Splattering involves loading a brush with diluted paint and then flicking or tapping it against your hand or another brush to create a spray of droplets on the paper. This technique works particularly well for adding a sense of movement, texture, or randomness. Sponging, on the other hand, involves using a natural or synthetic sponge to apply paint to the paper. This technique creates a more varied and textured surface compared to a flat wash. You can dab the sponge gently for subtle effects, or press it firmly for more pronounced texture. The type of sponge, as well as the amount of paint and pressure applied, will determine the final result. Both splattering and sponging are excellent for adding depth and visual interest to your watercolor paintings, perfect for backgrounds, foliage, and abstract elements. They encourage a more playful and experimental approach, broadening the expressive possibilities of watercolor.
Watercolor Tutorials and Resources
Numerous online platforms offer valuable watercolor tutorials, from basic techniques to advanced methods. These resources, including video lessons and step-by-step guides, are perfect for beginners and experienced artists alike. Explore communities for feedback and inspiration.
Online Video Tutorials
The internet is a treasure trove of online video tutorials for watercolor enthusiasts. Platforms like YouTube host countless channels dedicated to teaching watercolor techniques, catering to all skill levels. These videos offer visual demonstrations of various methods, from basic washes to intricate glazing. Many artists share their knowledge, providing step-by-step instructions and helpful tips to improve your skills. Whether you’re a beginner looking to learn the fundamentals or an experienced painter seeking advanced techniques, video tutorials offer convenient and accessible learning opportunities. Some channels offer comprehensive courses, while others focus on specific techniques or subjects. You can find tutorials covering everything from landscapes and florals to portraits and abstract art. The interactive nature of video allows you to follow along at your own pace, making it an effective way to learn and practice watercolor painting. Explore different artists and their unique approaches to find the methods that resonate with your style.
Step-by-Step Landscape Painting
Embarking on a landscape painting with watercolors involves a systematic approach that can be broken down into easy-to-follow steps. Begin by sketching a basic outline of your scene, focusing on key elements like the horizon line, trees, and mountains. Next, apply a light wash of color to establish the sky and distant background. Gradually build up layers, allowing each layer to dry before adding the next, to create depth and dimension. Use the wet-on-wet technique for soft blends, and the wet-on-dry technique for sharper edges and details. Incorporate masking techniques to preserve white areas for highlights. Introduce a variety of colors to add realism and depth. Remember that less is often more with watercolors, so start with a limited palette. Practice these steps repeatedly, and your landscape painting skills will improve over time. Don’t be afraid to experiment with different techniques to create your personal style.
Community and Critique Resources
Engaging with a community of fellow watercolor enthusiasts can significantly enhance your learning experience. Online platforms, such as forums and social media groups, provide spaces where artists can share their work, exchange tips, and offer constructive feedback. Participating in these communities allows you to see diverse approaches to watercolor painting and learn from the experiences of others. Seeking critiques on your paintings is essential for identifying areas for improvement and refining your technique. Don’t be afraid to share your work and ask for advice. Remember that feedback is a valuable tool for growth. There are also online resources, such as YouTube channels and online courses, that offer structured learning opportunities and personalized guidance. Explore these communities and resources to enrich your journey into the world of watercolor.